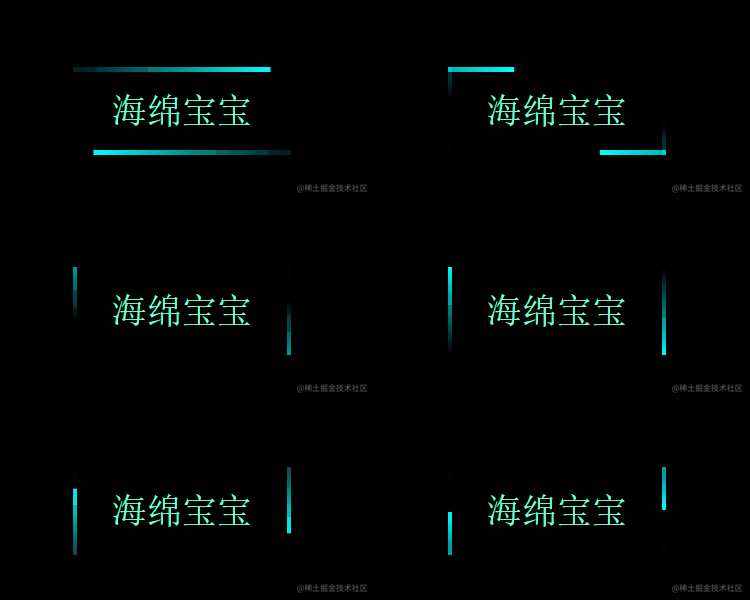
首先上一个效果图

有木有发现和夜晚街上的广告牌很像,接下来让我们看看如何使用css实现的吧
结构分析
首先很明显应该使用一个盒子将文字装起来,并且将文字进行了居中,然后我们看到这盒子的周围围绕了两条光带,那么这两条光带是怎么实现的呢?
其实这是用四个小盒子实现的,将这四个小盒子分别放在大盒子的周围(紧贴这大盒子的内壁),然后使用这几个小盒子实现流光(跑马灯)效果。
接下来看看具体的代码实现
代码实现
HTML结构
首先准备一个 div大
	<div class="main">
		跑马灯
		<div></div>
		<div></div>
		<div></div>
		<div></div>
	</div>
给大盒子设置样式,方便我们在浏览器中看到
	body {
		background-color: #000;
	}	.main {
		position: absolute;
		width: 400px;
		height: 150px;
		top: 50%;
		left: 50%;
		transform: translate(-50%, -50%);//当为百分百单位时,相对的是自身的宽高
		overflow: hidden; //溢出部分隐藏
		text-align: center;
		line-height: 150px;
	    background-color: transparent;
		color: aquamarine;
		font-size: 30px;
		font-family: '宋体';
	}
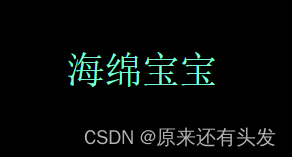
当前效果是这样的

接下来我们给大盒子设置灯光效果。
内部灯光效果
在效果图上,我们可以看到灯光尾部的颜色比较淡,头部颜色较亮, 展现出一种过渡效果,那这样的效果是怎么实现的呢?
这里就需要用到css3中 background linear-gradient
语法:
linear-gradient(渐变方向,color1,color2,color3...)
这里我选择了#fff, #acd, cyan渐变的三种配色
那就开始使用这个属性值,这是其中一个小盒子的效果(顶部),其他的效果实现方法都类似。
	.main div {
		position: absolute;
	}	.main :nth-child(1) {
		top: 0;
		left: 0;
		width: 100%;    //与父盒子等宽
		height: 2px;    //高要设置得较小
		background: linear-gradient(to right, #fff, #acd, cyan);
	}
这里设置的是顶部的灯光效果,使用 top left width:100% height:2px
接着剩下三条灯光的实现原理基本相同,只有位置和背景颜色不同
剩下右,下,左背景颜色的渐变方向分别是 to bottom to left to top
目前效果是这样的:

这离我们想要的跑马灯效果越来越像了
其实我们还差最后一步,给灯光加上动画效果,也就是css3中的animation动画属性
同样我们也以设置顶部的灯光效果作为示范:
css3动画:
	@keyframes run1 {
		from {
			transform: translateX(-100%) //初始让它沿X轴负方向(向左)位移自身的宽度
		}		to {
			transform: translateX(100%)  //动画结束时,让它回到原位
		}
	}
给盒子加上动画
.main :nth-child(1) {
		top: 0;
		left: 0;
		width: 100%;
		height: 2px;
	    animation: run1 1s linear infinite;//复合属性写法,其中infinite是让动画效果无限循环
		background: linear-gradient(to right, #fff, #acd, cyan);
	}
前面没有设置动画之前,可以看到颜色最深的部分在最右边,但是跑马灯的实现需求是需要颜色最深部分从左边出现,然后移动到右边,所以应该将动画的初识位置向左移整个盒子的长度,这样就实现了需求
剩下三个盒子的实现方式类似,设置好后,最终得到我们想要的跑马灯效果
全部代码如下:
<!DOCTYPE html>
<html lang="en"><head>
	<meta charset="UTF-8">
	<meta http-equiv="X-UA-Compatible" content="IE=edge">
	<meta name="viewport" content="width=device-width, initial-scale=1.0">
	<title>Document</title>
</head>
<style>
	body {
		background-color: #000;
	}	.main {
		position: absolute;
		width: 400px;
		height: 150px;
		top: 50%;
		left: 50%;
		transform: translate(-50%, -50%);
		overflow: hidden;
		text-align: center;
		background-color: transparent;
		line-height: 150px;
		color: aquamarine;
		font-size: 30px;
		font-family: '宋体';
	}	.main div {
		position: absolute;
	}	.main :nth-child(1) {
		top: 0;
		left: 0;
		width: 100%;
		height: 2px;
		animation: run1 1s linear infinite;
		/* animation-delay: 0s;  */
		background: linear-gradient(to right, #fff, #acd, cyan);
	}	.main :nth-child(2) {
		top: 0;
		right: 0;
		height: 100%;
		width: 2px;
		animation: run2 1s linear infinite;
		/* animation-delay: 1s; 设置动画延迟加载时间*/
		background: linear-gradient(to bottom, #fff, #acd, cyan);
	}	.main :nth-child(3) {
		bottom: 0;
		left: 0;
		height: 2px;
		width: 100%;
		animation: run3 1s linear infinite;
		/* animation-delay: 2s; 设置动画延迟加载时间*/
		background: linear-gradient(to right, #fff, #acd, cyan);
	}	.main :nth-child(4) {
		top: 0;
		left: 0;
		height: 100%;
		width: 2px;
		animation: run4 1s linear infinite;
		/* animation-delay: 3s; 设置动画延迟加载时间 */
		background: linear-gradient(to top, #fff, #acd, cyan);
	}	@keyframes run1 {
		from {
			transform: translateX(-100%)
		}		to {
			transform: translateX(100%)
		}
	}	@keyframes run2 {
		from {
			transform: translateY(-100%)
		}		to {
			transform: translateY(100%)
		}
	}	@keyframes run3 {
		from {
			transform: translateX(100%)
		}		to {
			transform: translateX(-100%)
		}
	}	@keyframes run4 {
		from {
			transform: translateY(100%)
		}		to {
			transform: translateY(-100%)
		}
	}
</style><body>
	<div class="main">
		海绵宝宝
		<div></div>
		<div></div>
		<div></div>
		<div></div>
	</div>
</body></html>
最后,希望本文对你有所帮助,阿里嘎多
欢迎分享,转载请注明来源:内存溢出

 微信扫一扫
微信扫一扫
 支付宝扫一扫
评论列表(0条)