采用github大佬的开源智能语音交互使用hass插件通过MQTT控制esp8266设备
本人小白会以小白的方式一步一步进行
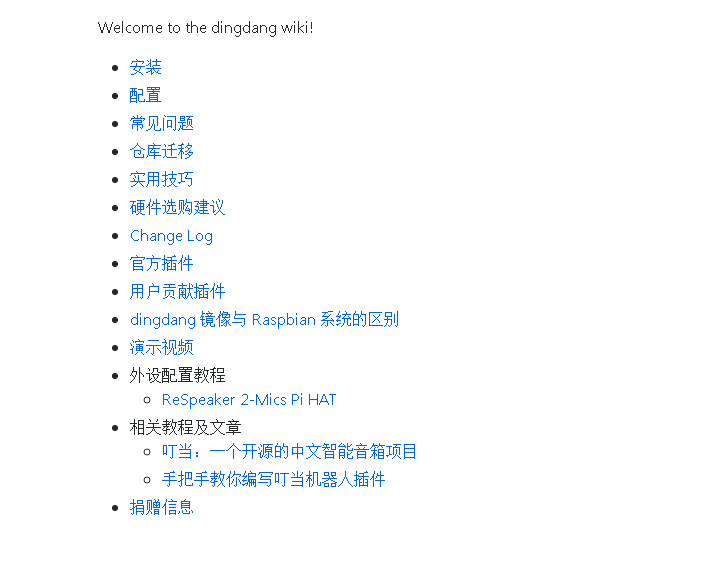
首先先到github上安装叮当 手动还是 镜像自己选择
硬件设备:树莓派、esp8266继电器模块、seeed raspberry pi 双麦克风扩展板、USB音响、吸顶灯、32G内存卡、读卡器

安装中遇到的问题在常见问题中自助
还有一点就是内存卡尽量选择16G以上质量稍微好点的不然很可能会出现一些奇奇怪怪的问题
安装好后先测试一下麦克风可音响是否都正常工作了具体看其中的 “配置”
安装完成可以正常工作后 开始安装homeassistant
简单粗暴 sudo pip3 install homeassistant
完成后 hass
过程有点慢静静等待 我在安装过程中老是会卡在一个地方(check your config什么的)我不知道为什么 需要终止掉重新hass才可以继续请知道的大佬告知
安装完成后打开网页输入XXX.XXX.XXX.XXX:8123 访问homeassistant

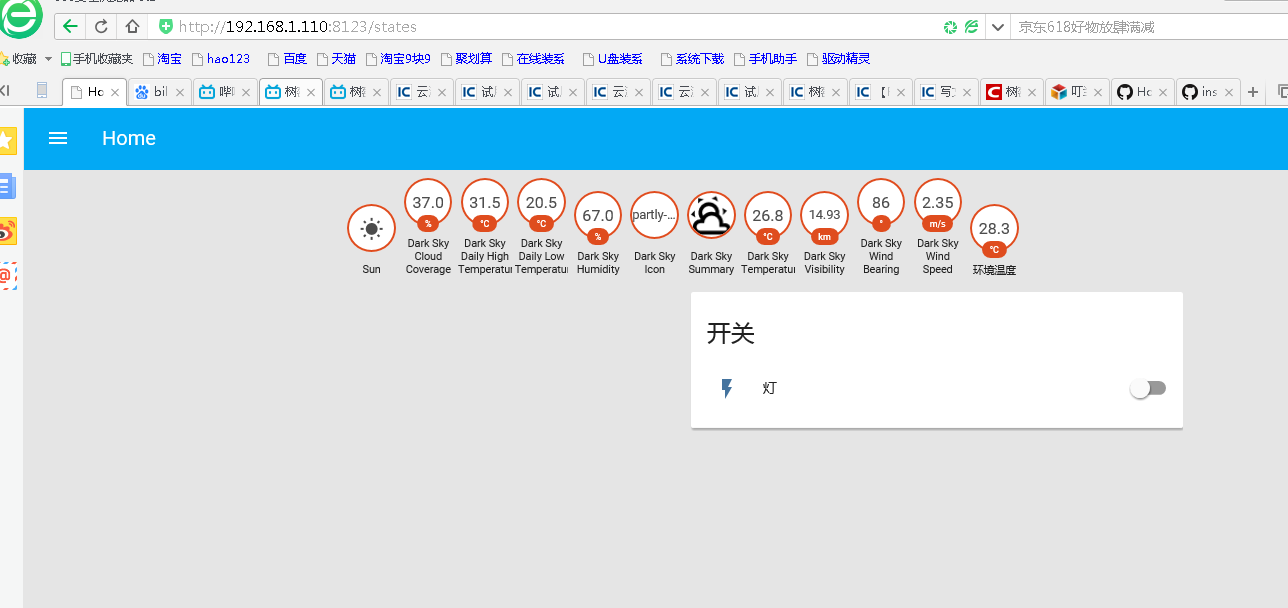
出现类似这个画面就算是安装成功了
接下来要做的就是要搭建MQTT
先来安装mosquito
wget http://mosquitto.org/files/source/mosquitto-1.5.tar.gz
解压
tar zxfv mosquitto-1.5.tar.gz
进入目录
cd mosquitto-1.5
编译
make
安装
sudo make install
安装后打开服务
sudo systemctl start mosquitto
之后开始配置hass你可以选择两种方式1是直接wincp打开.homeassistant文件夹中的configuraTIon.yaml开搞2.通过建立samba服务来编辑
homeassistant: # Name of the locaTIon where Home Assistant is running name: Home # LocaTIon required to calculate the TIme the sun rises and sets latitude: 34.6836 longitude: 113.5325 # Impacts weather/sunrise data (altitude above sea level in meters) elevation: 0 # metric for Metric, imperial for Imperial unit_system: metric # Pick yours from here: http://en.wikipedia.org/wiki/List_of_tz_database_time_zones time_zone: Asia/Shanghai # Customization file customize: !include customize.yaml# Show links to resources in log and frontendintroduction:# Enables the frontendfrontend:# Enables configuration UIconfig:http: # Secrets are defined in the file secrets.yaml # api_password: !secret http_password # Uncomment this if you are using SSL/TLS, running in Docker container, etc. # base_url: example.duckdns.org:8123# Checks for available updates# Note: This component will send some information about your system to# the developers to assist with development of Home Assistant.# For more information, please see:# https://home-assistant.io/blog/2016/10/25/explaining-the-updater/updater: # Optional, allows Home Assistant developers to focus on popular components. # include_used_components: true# Discover some devices automaticallydiscovery: # Allows you to issue voice commands from the frontend in enabled browsersconversation:# Enables support for tracking state changes over timehistory:# View all events in a logbooklogbook:# Enables a map showing the location of tracked devicesmap:# Track the sunsun:mqtt: broker: 192.168.1.110 port: 1883 client_id: home-assistant-1 keepalive: 60 username: pi password: raspberry protocol: 3.1.1switch: platform: mqtt name: "Sonoff_WoShi_4" state_topic: "home/Bed_room/4/stat" command_topic: "home/Bed_room/4" qos: 1 payload_on: "on" payload_off: "off" retain: true # Weather predictionsensor: - platform: darksky api_key: 1c53178f89697fa08b20575f9c0ef0c1 # 在forecast.io网站注册并获得,然后填写好 monitored_conditions: - summary - icon #- nearest_storm_distance #- nearest_storm_bearing #- precip_type #- precip_intensity #- precip_probability - temperature - apparent_temperature #- dew_point - wind_speed - wind_bearing - cloud_cover - humidity #- pressure - visibility #- ozone #- minutely_summary #- hourly_summary #- daily_summary - temperature_max - temperature_min #- apparent_temperature_max #- apparent_temperature_min #- precip_intensity_max # Text to speechtts: - platform: google# Cloudcloud:group: !include groups.yamlautomation: !include automations.yamlscript: !include scripts.yaml
仅供参考
之后还要编辑.homeassistant中customize.yaml
switch.Sonoff_WoShi_4: friendly_name: "灯" dingdang: {"开灯":"on", "开灯":"turn_on", "关灯":"off", "关灯":"turn_off"}sensor.dark_sky_apparent_temperature: friendly_name: "环境温度" dingdang: ["查看环境温度", "当前环境温度", "环境温度"]
编辑完成后保存 打开网页进入homeassistant

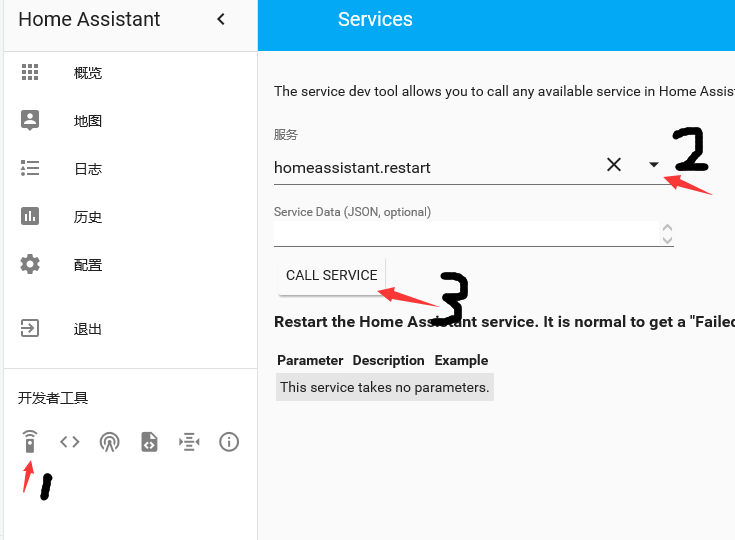
重启hass服务当然在putty重启也一样
稍等重新开启后你会看到一个灯 和一个开关按钮至此homeassistant就配置完毕了
接下来开始给esp8266烧写固件
由于图方便直接TB买了sonoff的那个也考虑到是直接接到220上买了还是方便我不愿意去碰电源模块什么的别问我为什么
总而言之 你也可以自己做一个 8266 的继电器
以这个为例 直接上链接https://bbs.feng.com/read-htm-tid-10878311.html 教程很详细 一步一步跟着做
固件配置烧写完成后 打开homeassistant 点击开关按钮 点灯成功
OK
之后打开叮当的配置文件将homeassistant插件添加上去
cd .dingdang
nano profile.yml
根据配置修改添加到 最后面插件
修改后保存退出
下面再次运行叮当
直接唤醒后“帮我开灯”
叮当:执行成功
欢迎分享,转载请注明来源:内存溢出

 微信扫一扫
微信扫一扫
 支付宝扫一扫
评论列表(0条)