
例如一个神经元对猫的眼睛敏感,那当它看到猫的眼睛的时候,就被激励了,相应的参数就会被调优,它的贡献就会越大。
下面是几种常见的激活函数:
x轴表示传递过来的值,y轴表示它传递出去的值:
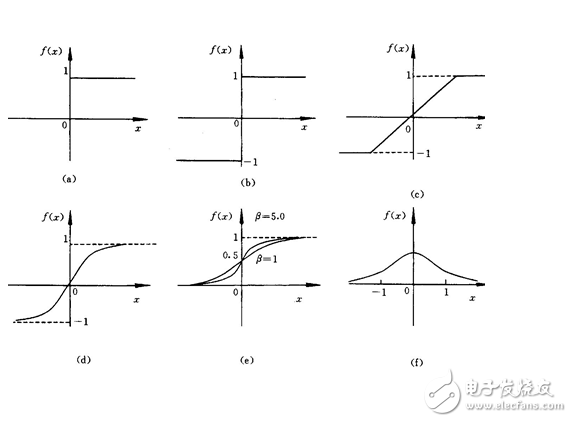
激励函数在预测层,判断哪些值要被送到预测结果那里:
TensorFlow 常用的 acTIvaTIon funcTIon
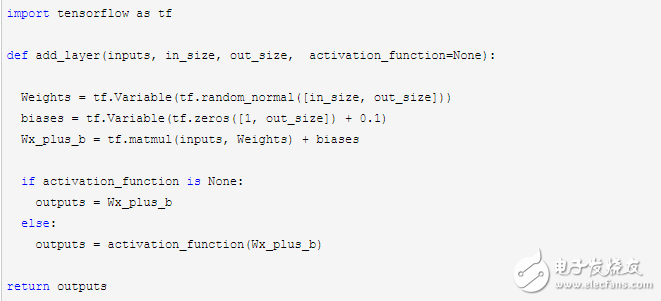
(2)添加神经层:输入参数有 inputs, in_size, out_size, 和 acTIvation_function
分类问题的 loss 函数 cross_entropy :

overfitting:
下面第三个图就是 overfitting,就是过度准确地拟合了历史数据,而对新数据预测时就会有很大误差:

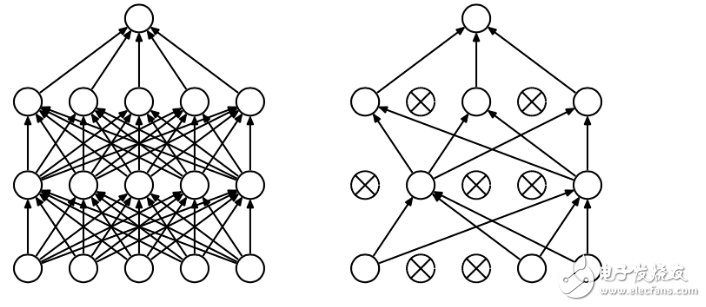
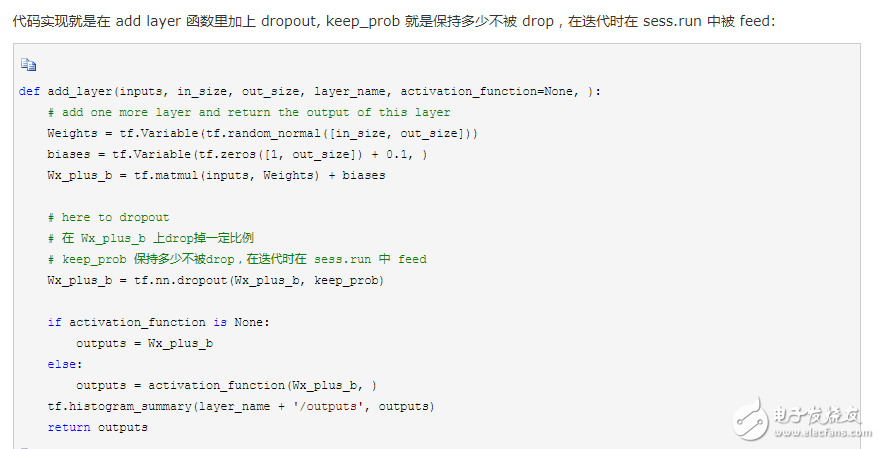
Tensorflow 有一个很好的工具, 叫做dropout, 只需要给予它一个不被 drop 掉的百分比,就能很好地降低 overfitting。
dropout 是指在深度学习网络的训练过程中,按照一定的概率将一部分神经网络单元暂时从网络中丢弃,相当于从原始的网络中找到一个更瘦的网络,这篇博客中讲的非常详细
5. 可视化 Tensorboard
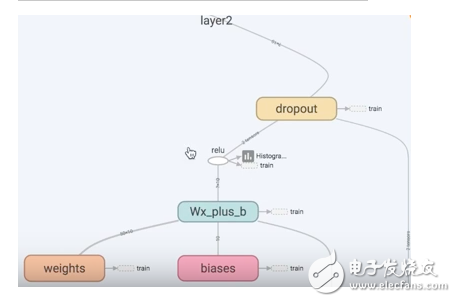
Tensorflow 自带 tensorboard ,可以自动显示我们所建造的神经网络流程图:
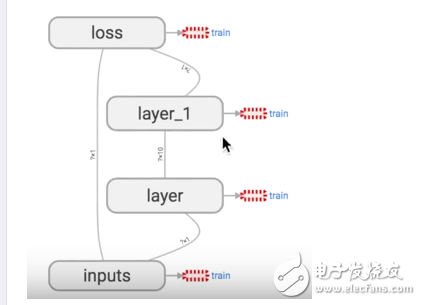
就是用 with tf.name_scope 定义各个框架,注意看代码注释中的区别:
import tensorflow as tf
def add_layer(inputs, in_size, out_size, activation_function=None):
# add one more layer and return the output of this layer
# 区别:大框架,定义层 layer,里面有 小部件
with tf.name_scope(‘layer’):
# 区别:小部件
with tf.name_scope(‘weights’):
Weights = tf.Variable(tf.random_normal([in_size, out_size]), name=‘W’)
with tf.name_scope(‘biases’):
biases = tf.Variable(tf.zeros([1, out_size]) + 0.1, name=‘b’)
with tf.name_scope(‘Wx_plus_b’):
Wx_plus_b = tf.add(tf.matmul(inputs, Weights), biases)
if activation_function is None:
outputs = Wx_plus_b
else:
outputs = activation_function(Wx_plus_b, )
return outputs
# define placeholder for inputs to network
# 区别:大框架,里面有 inputs x,y
with tf.name_scope(‘inputs’):
xs = tf.placeholder(tf.float32, [None, 1], name=‘x_input’)
ys = tf.placeholder(tf.float32, [None, 1], name=‘y_input’)
# add hidden layer
l1 = add_layer(xs, 1, 10, activation_function=tf.nn.relu)
# add output layer
prediction = add_layer(l1, 10, 1, activation_function=None)
# the error between prediciton and real data
# 区别:定义框架 loss
with tf.name_scope(‘loss’):
loss = tf.reduce_mean(tf.reduce_sum(tf.square(ys - prediction),
reduction_indices=[1]))
# 区别:定义框架 train
with tf.name_scope(‘train’):
train_step = tf.train.GradientDescentOptimizer(0.1).minimize(loss)
sess = tf.Session()
# 区别:sess.graph 把所有框架加载到一个文件中放到文件夹“logs/”里
# 接着打开terminal,进入你存放的文件夹地址上一层,运行命令 tensorboard --logdir=‘logs/’
# 会返回一个地址,然后用浏览器打开这个地址,在 graph 标签栏下打开
writer = tf.train.SummaryWriter(“logs/”, sess.graph)
# important step
sess.run(tf.initialize_all_variables())
运行完上面代码后,打开 terminal,进入你存放的文件夹地址上一层,运行命令 tensorboard --logdir=‘logs/’ 后会返回一个地址,然后用浏览器打开这个地址,点击 graph 标签栏下就可以看到流程图了
6. 保存和加载训练好了一个神经网络后,可以保存起来下次使用时再次加载:import tensorflow as tf
import numpy as np
## Save to file
# remember to define the same dtype and shape when restore
W = tf.Variable([[1,2,3],[3,4,5]], dtype=tf.float32, name=‘weights’)
b = tf.Variable([[1,2,3]], dtype=tf.float32, name=‘biases’)
init= tf.initialize_all_variables()
saver = tf.train.Saver()
# 用 saver 将所有的 variable 保存到定义的路径
with tf.Session() as sess:
sess.run(init)
save_path = saver.save(sess, “my_net/save_net.ckpt”)
print(“Save to path: ”, save_path)
################################################
# restore variables
# redefine the same shape and same type for your variables
W = tf.Variable(np.arange(6).reshape((2, 3)), dtype=tf.float32, name=“weights”)
b = tf.Variable(np.arange(3).reshape((1, 3)), dtype=tf.float32, name=“biases”)
# not need init step
saver = tf.train.Saver()
# 用 saver 从路径中将 save_net.ckpt 保存的 W 和 b restore 进来
with tf.Session() as sess:
saver.restore(sess, “my_net/save_net.ckpt”)
print(“weights:”, sess.run(W))
print(“biases:”, sess.run(b))
欢迎分享,转载请注明来源:内存溢出

 微信扫一扫
微信扫一扫
 支付宝扫一扫
评论列表(0条)